An expert’s guide to a bouncy blow-wave

Share
Share
Copy
Great hair starts with the right tools and techniques. Hair stylist, Rachel Vitullo (@rachelvitullo) draws on 15 years of expertise to take you through her step-by-step blow-wave tutorial. Covering everything from wash-day essentials and hair prep to sectioning, tension, technique and finishing products, she shows you how to achieve a long-lasting, polished blow-wave.
1. Shower must-haves for your hair type
Preparation is everything and it begins before you even pick up a styling tool. Rachel recommends a lightweight shampoo and conditioner that doesn’t weigh your hair down to give you maximum movement and shine. You’ll find a great range of lightweight hair care options from Salon Express.
2. Prep your hair for styling
Fresh out of the shower, apply a heat protectant and then layer texturising product. Spraying these onto damp hair will allow them to fully absorb and protect your hair. Make sure you brush through to smooth and make sectioning easier. Together, these products work to protect your hair while adding grip, helping your style hold for longer and preventing damage. Find a wide range of heat protectants and texturising products at Priceline.
3. Blast dry to reduce frizz
Using a blow-dryer, gently blast dry your hair to remove excess moisture. The goal here is to smooth frizz without over-stretching your hair. A multi-styler set is a gamechanger for this step, allowing you to dry, brush and curl all in one tool, without needing to switch. Explore the best multi-styler tool that works best for your hair from Big W.
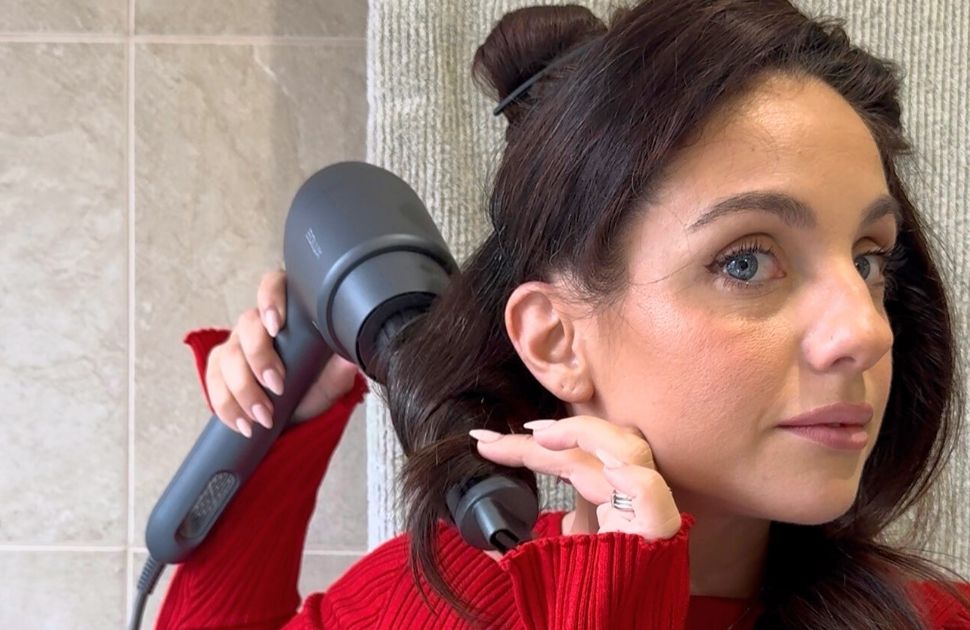
4. Section for a consistent result
Once your hair is almost dry, create an almond-shaped section from the crown to the front and clip it away.
Starting at the back, use the curler attachment from roots to ends, directing your hair forward and softly rolling the ends under. This is where tension becomes key: pulling the section taut as you work through will give you the most shine and smoothness. Repeat on the opposite side, drying the roots upward to build lift and volume at the base.
5. Style the front section
Next, blow dry the front section forward to frame your face, then drop the top section to your natural part and continue the same over-directed motion throughout. Once each section is complete, a quick blast of cool air will help lock in the shape and extend its hold.
6. Finish and set
To finish this all off, brush through from roots to ends to marry all sections together for a seamless, polished result. Use your fingertips to dress your hair and add the final shape, then lock everything in with a flexible-hold hairspray. This will ensure your blow-wave stays bouncy and shiny all throughout the day.
To see Rachel bring this to life, head to @ellenbrookcentral to watch the full tutorial, and find all the styling products she used at Ellenbrook Central.
Share
Share
Copy
- 11 Main Street, Ellenbrook, WA 6069
- Call us (08) 9297 0300
- Get directions via Google